Turning Windows 10 into a WiFi hotspot is easy to do.
If you are using a desktop a wireless USB dongle can be used or the built-in wireless will work with most laptops.
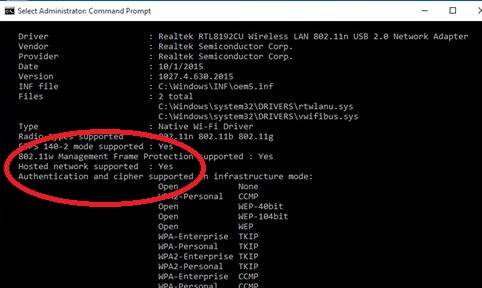
First Hosted Network should be checked to be sure it is enabled.
How to check if Hosted Network is Supported and enabled.
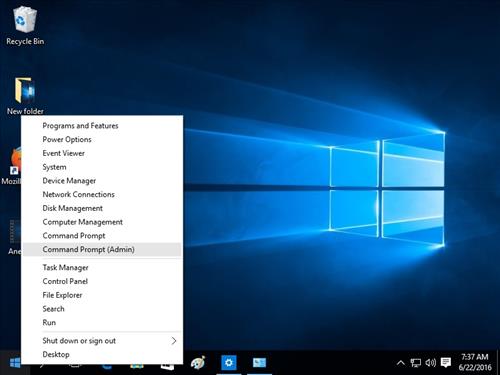
…..Right Click the start button and click Command Prompt (Admin).
…..In the command box type netsh wlan show drivers
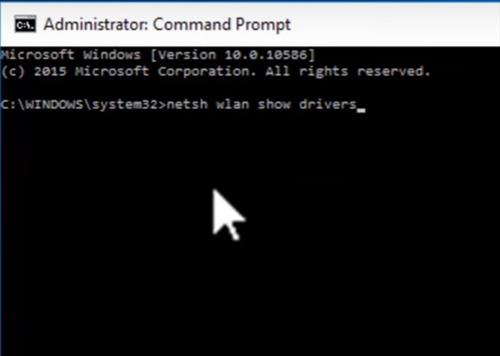
…After it is run information will scroll by, look for Hosted network supported, it should be YES.
How To Turn Your Window 10 PC into a WiFi Hotspot
- Type, or Copy and Paste the following commands in, netsh wlan set hostednetwork mode=allow ssid=ssidname key=wifipassword
- Next type the following command or copy and paste it into the box, netsh wlan start hostednetwork
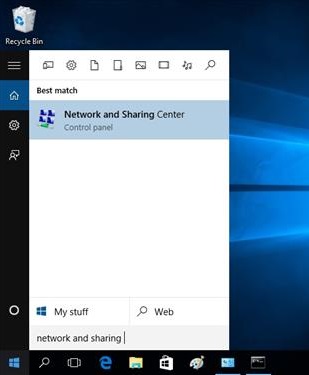
- We now need to go to Network Settings. Click the start button and type in Network and Sharing and click the option.
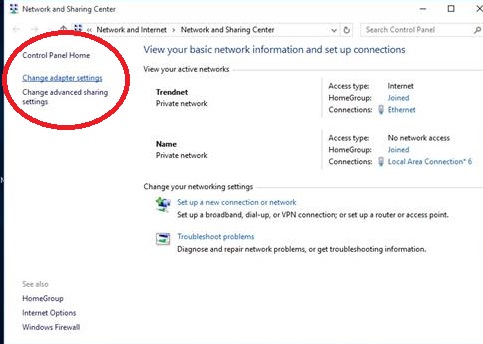
- On the left click Change Adapter Settings.
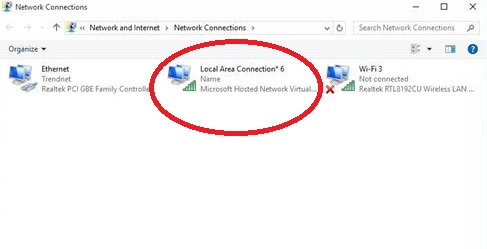
- A new created Hosted network will show up along with the other connections.
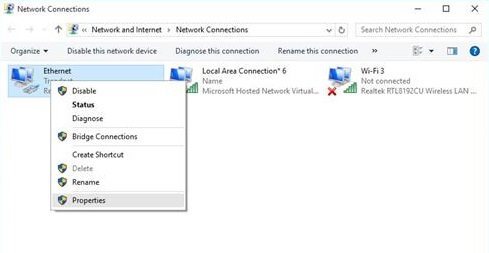
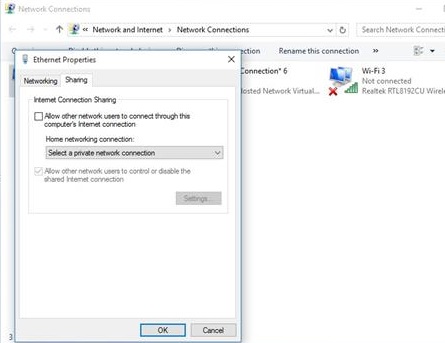
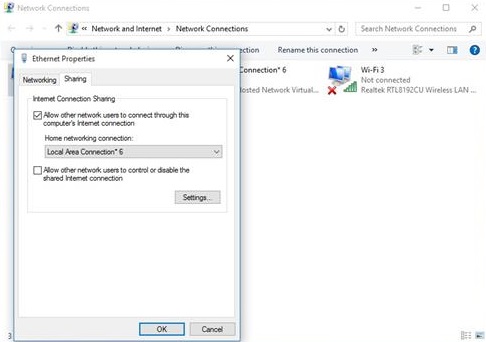
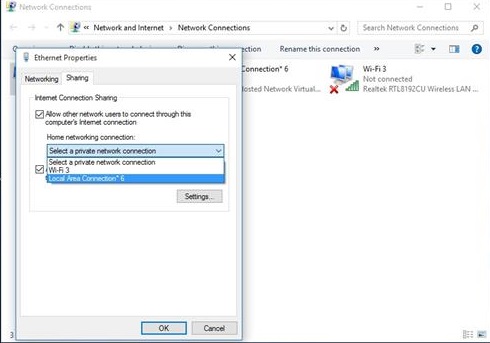
- Next Right Click the Ethernet internet connection and select Properties.
- Select the Sharing tab.
- Uncheck the box titled “Allow other network users to control or disable the shared internet connection.
- You should now have a WiFi hotspot setup. Unless it was changed above it will be SSID Broadcast name ssidname and the password wifipassword

The ssid= and key= can be changed to your own unique name and password.
Check the box titled “Allow other users to connect though this computers internet connection.
From the drop down box select the newly created Hosted Network which will be labeled Local Area Connection.
To turn off the hotspot type netsh wlan stop hostednetwork in the command box.

